To add and modify choice and condition endpoints, click the additional details icon on the decision point and click Add Choice or Add Condition in the Additional Detail window.
In a decision point's Additional Details modal, you can configure where all of its choices/conditions end, as well as create new ones.
To add and modify choice and condition endpoints:
Click the additional details icon () on the decision point whose choices/conditions you wish to edit.
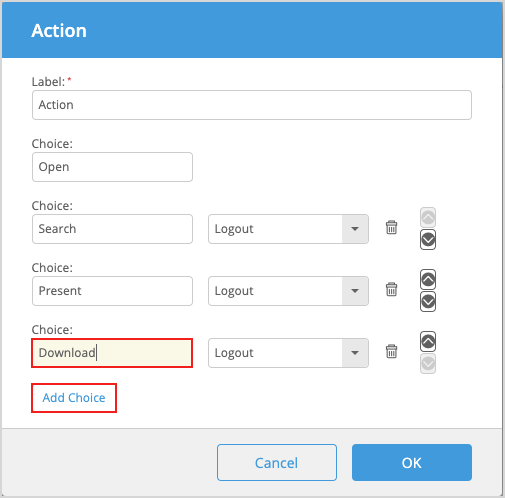
In the Additional Detail window, click Add Choice or Add Condition and enter a name for the new choice or condition.By default, the newly added choice/condition endpoint is set as the next task.
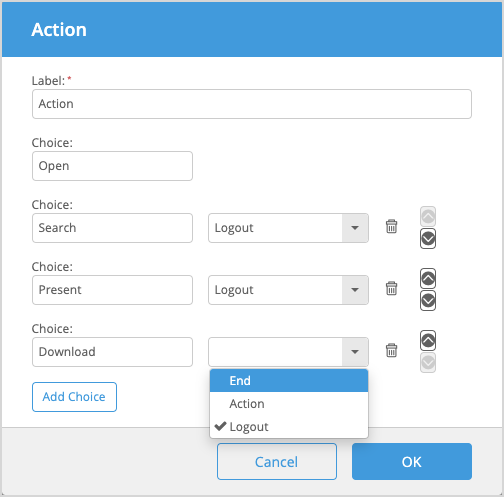
Click the drop-down menu and select a new endpoint.In addition to the End of the Process, all valid endpoints for the choice/condition (that is, other tasks and user-choice decision points) are listed by name.
Choices/conditions cannot point to the beginning of a sibling choice/condition; these endpoints are not listed.
Rename the choice/condition to describe the scenario in which it takes place. When Blueprint generates a user story, the names given to system decision-point conditions are used to label scenarios in the user story Acceptance Criteria section.
Continue to Add Choices or Add Conditions until you have as many as required.
 ) on the decision point whose choices/conditions you wish to edit.
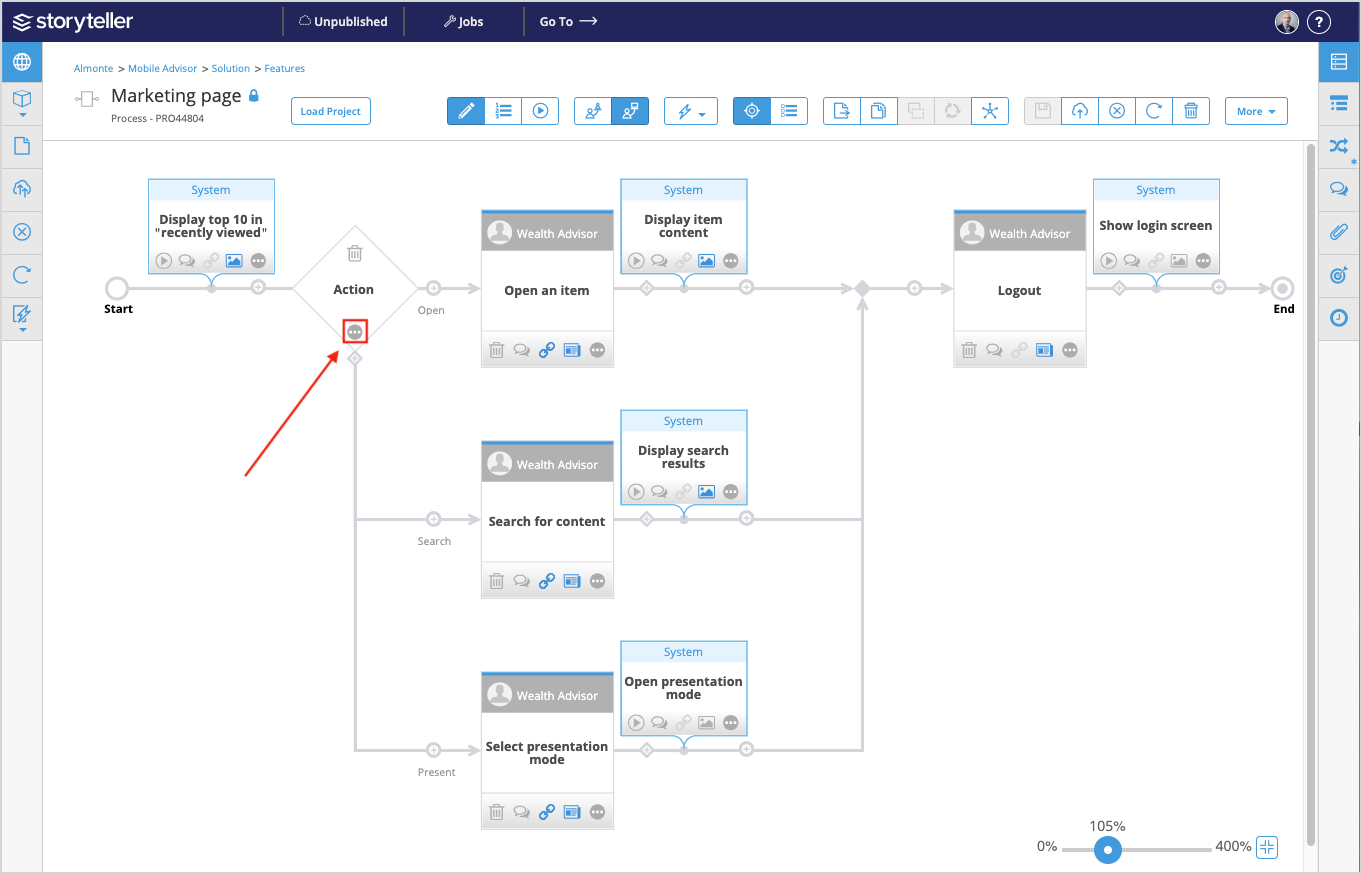
 Choices/conditions cannot point to the beginning of a sibling choice/condition; these endpoints are not listed.