Edit Pods
To edit a pod, click Edit Pod, and then click Delete or click Edit to make your changes.
Once you’ve created a pod file, you can edit it to change its contents.
Step 1 - Select a File
Click the Edit Pod file button under the AutoTag Manager tab.

Choose the pod file you want to edit from the dialog box displayed—in this example, we’ll select the “practice pod” file.

Step 2 - Edit the File
Once you’ve selected the pod file you want to edit, a window listing all the pods that file contains is displayed.
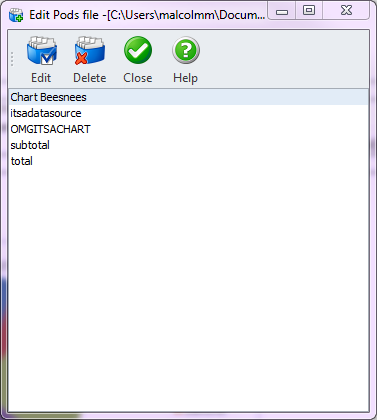
Step 3 - Change and Delete Pods
From the pod editing window, click the Delete button to remove a pod from the file, or click the Edit button to change the name and description of a pod.

Once you’ve finished editing your pod file, click the Close button to go back to editing your template.
How did we do?
Create Pods
Load Pods