Update Pods
To update pods, you must frame them, replace the pod file, and update it through the .NET engine.
A very useful function of pods is the ability to update them when changes have been made. For example, if a company that uses their logo as a header for all reports and documents on their system decides to change their logo, it would be a very tedious process to manually remove and insert the new logo in each and every document. But if this logo was originally created and added as a pod file to the document, it can easily be updated to the new logo.
The following steps illustrate how to update pods for your document templates.
Step 1 - Pod Framing
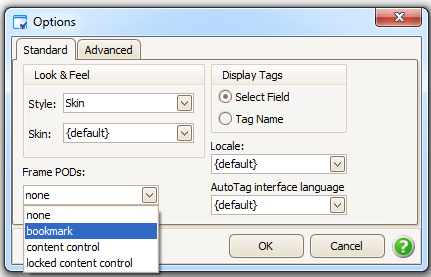
Pods must be framed in order for them to update correctly. Under the AutoTag Manager, select the options button to find the pod framing menu.
On the bottom, a Frame PODS drop down menu with the following four options is displayed:
- None: This is the default setting and will not frame your pods nor allow them to be updated
- Bookmark: Frames pods allowing the start and end to be anywhere in the document. This allows you to easily create pods that are segments of larger paragraphs or tables. However, because they can be any shape or size these pods are more difficult to locate later on.
- Content Control: Frames pods within a rectangular region. These pods are limited to their rectangle shape, but are much easier to find.
- Locked Content Control: Same as content control only locked so they may not be modified at a later time.
Step 2 - Replacing the Pod File
Once you have successfully created, loaded and saved a framed pod file to a document, you are ready to update it.
First, replace the old pod file with the new one you want to update it with.
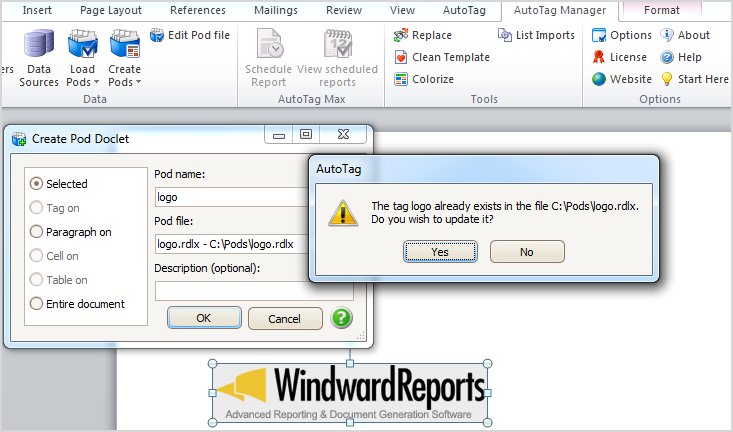
Select the image, text or table you would like to replace your pod with and press the create pods button in the AutoTag manager. You must use the same pod name and file as the original pod we would like to update.
Once this is complete and you select OK, you will be prompted that you are about to replace the pod. Select Yes.
Step 3 - Updating the Pod through the .NET Engine
After your pod file has been replaced with the new one, you need to run the updatepods.exe program so the existing documents containing that pod will be updated accordingly. The updatepods.exe file can be located in the Windward Reports .NET Engine folder.
In order to update pods, you need to add this to file location to your path. Once this is complete, open your command prompt to run the update pods program. Both your pod files and documents that need to be updated should be located in the same folder to make the update process easier.
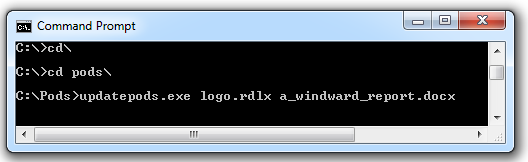
Next, in the command prompt, you simply change directory to the folder containing your pods and documents: type “updatepods.exe” followed by the .rdlx pod file followed by the document.
(For example: C:\Pods>updatepods.exe logo.rdlx a_windward_report.docx).
Click enter and the pods will be updated accordingly.
How did we do?
Load Pods
Use Pods