Add Traces in the Utility Panel
To add traces in the Utility Panel, click the Relationships tab in the Utility Panel. Search for and select the artifact you want to create a trace with and select the direction of the trace.
To add traces in the Utility Panel:
- While working on the artifact of interest, click the Relationships tab in the Utility Panel.
- Under the Relationships tab in the Utility Panel:
- Search for the artifact you want to create a trace with by entering its artifact ID, artifact name, prefix, or even a portion of its description in the quick search bar.
You can also directly add multiple artifacts with the artifact ID without the prefix according to the following format: Artifact ID; Artifact ID; etc. If an incorrect or not applicable artifact ID is entered, it is displayed in red and not applied when you conduct the trace operation.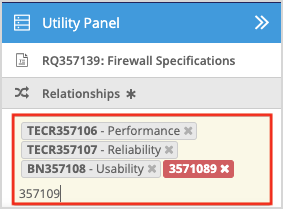
- Select the artifact you want to create a trace with, displayed in the search results.
The results displayed are results within the project you are working in. To search for artifacts across all projects in your instance, click Search All Projects at the bottom of the search results.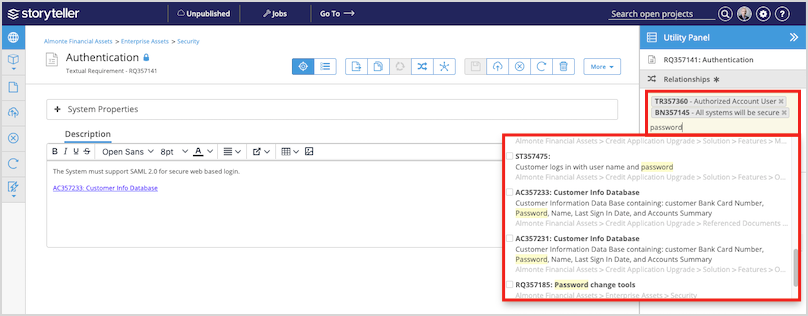
- You can select one or multiple artifacts to create a trace with. To select multiple artifacts, simply click all the artifacts desired in the search results displayed.
- Select the direction of the trace according to the following:
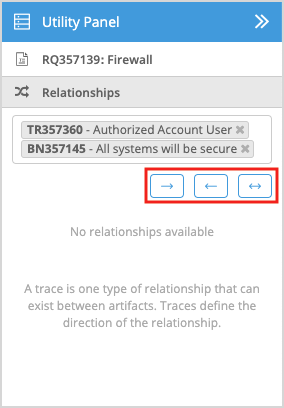

Traces to

Traces from

Bidirectional
- Search for the artifact you want to create a trace with by entering its artifact ID, artifact name, prefix, or even a portion of its description in the quick search bar.
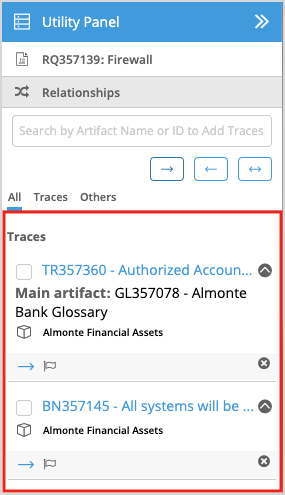
The trace relationships are established and visible under the Relationships tab in the Utility Panel.
To edit the direction of the trace, see the Edit Direction of Traces article.
How did we do?
Add Traces
Add Traces Using the Manage Traces Button